

Table of Contents
- 1. Start With Freshly Ground Coffee and the Right Pour-Over Coffee Grind Size
- 2. Nail Your Pour-Over Coffee Ratio and Weigh Every Cup
- 3. Dial In Pour-Over Coffee Water Temperature
- 4. Use Filtered Water and Pay Attention to Water Quality
- 5. Rinse the Filter, Level the Coffee Bed, and Bloom Properly
- 6. Refine Your Pouring Technique and Pour Pattern
- 7. How to Fix Bitter Pour-Over Coffee (and Sour Cups Too)
- Conclusion
- Frequently Asked Questions
Last Updated: October 17, 2026
1. Start With Freshly Ground Coffee and the Right Pour-Over Coffee Grind Size
Great pour over coffee starts with freshly ground beans and a pour over coffee grind that matches your paper filter. That single decision shapes flavor clarity more than any gadget you can buy.
Grind size is the biggest lever you control. Too coarse and water rushes through, leaving a thin, sour cup. Too fine and the filter clogs, drawing out bitterness. Aim for a medium-fine texture, close to coarse sea salt, and adjust from there.
How Grind Consistency Affects Flavor Clarity
Consistency matters as much as the setting itself. A grinder that produces a mix of boulders and dust brews unevenly: some grounds extract too fast, others too slow, and the cup tastes muddy.
If you are buying pre-ground, ask for a pour-over grind and use it within a couple of weeks. Freshly ground coffee, weighed just before brewing, gives you the cleanest starting point.
2. Nail Your Pour-Over Coffee Ratio and Weigh Every Cup
Your pour-over coffee ratio is the fastest way to fix a cup that tastes too weak or too strong. Weigh both the coffee and the water instead of eyeballing scoops.
Start with a 1:16 ratio: 15 grams of coffee to 240 grams of water for a single mug. Want more body? Tighten to 1:15. Want a lighter, tea-like cup? Loosen to 1:17. Change one number at a time and taste the difference.
A Baseline Recipe You Can Repeat
- Weigh 15 g freshly ground coffee
- Heat 250 g filtered water
- Rinse the paper filter
- Add grounds, level the bed
- Bloom with 30 g water, wait 30 seconds
- Pour in slow pulses to 240 g total
- Target a 2:30 to 3:00 total brew time
3. Dial In Pour-Over Coffee Water Temperature
Pour-over coffee water temperature should land between 90°C and 96°C for most beans. Water that is too cool under-extracts and tastes sour; water at a rolling boil scorches delicate notes. A simple kettle thermometer removes the guesswork.
Lighter roasts reward the hotter end of that range because their structure is denser and harder to extract. Darker roasts do better a few degrees cooler, where you avoid pulling out harsh, ashy flavors. Let the kettle rest 30 seconds off the boil before you start pouring.
4. Use Filtered Water and Pay Attention to Water Quality
Water quality quietly decides how your pour over tastes, and most brewers ignore it. Coffee is roughly 98% water, so chlorine, hard minerals, or a metallic edge in your tap will show up in the cup. Filtered water is the cheapest upgrade you can make, but "filtered" is not a single thing, and the mineral content of your water changes extraction in ways you can taste.
What Actually Matters in Brewing Water
Two numbers do most of the work: hardness (mostly calcium and magnesium) and alkalinity (mostly bicarbonate).
- Hardness helps extraction. Magnesium in particular binds to coffee's flavor compounds and pulls them into the cup. Very soft water, distilled, reverse-osmosis, or heavily softened, can leave coffee tasting flat or hollow because there are too few minerals to do that work.
- Alkalinity buffers acidity. A little is good; too much neutralizes the bright acids that make light roasts taste lively, and the cup reads dull or chalky. Very hard tap water is often high in both, which is why it flattens flavor and scales your kettle.
A common target range practitioners cite is roughly 50-150 ppm hardness and 40-80 ppm alkalinity, enough minerals to extract well, not so much buffer that acidity disappears. You do not need a lab kit to get close; a cheap TDS pen gives you a rough hardness read, and your water utility's annual quality report lists alkalinity for your tap.
Practical Fixes by Water Type
- Chlorinated tap: A basic carbon filter (pitcher or under-sink) strips chlorine and improves flavor clarity without removing the minerals that help extraction. Change the cartridge on schedule, a spent filter stops working quietly.
- Very hard tap: Carbon filtration does not soften water. If your kettle scales quickly, either dilute hard tap with a little low-mineral bottled water or use a filter that targets hardness. Do not go all the way to distilled; blend it back toward the target range.
- Soft or RO water: Add minerals back. A pinch of brewing-specific mineral salts, or blending 20-30% hard tap into RO water, restores the calcium and magnesium that extraction needs.
- Bottled water: Check the label. Low-mineral spring water often sits in a good range; "purified" water is usually stripped and behaves like RO.
For the full target ranges and the chemistry behind them, the Specialty Coffee Association's water standards set out the mineral guidelines brewers use as a reference.
5. Rinse the Filter, Level the Coffee Bed, and Bloom Properly
Rinsing the paper filter, leveling the coffee bed, and blooming the grounds are three small habits that lift cup quality fast. Rinsing removes papery taste and preheats the dripper. Leveling the bed gives water an even path through the coffee. The bloom lets trapped gas escape before the main pour.
Why the Bloom Phase Matters
Fresh coffee releases carbon dioxide when it meets hot water, and that gas pushes water away from the grounds. A 30-second bloom with about twice the coffee's weight in water lets the bed degas. Skip it and the first part of your pour runs around the coffee instead of through it, which leaves you with a flat, uneven cup.
6. Refine Your Pouring Technique and Pour Pattern
A steady pouring technique and a controlled pour pattern turn a good recipe into a consistent one. Use a gooseneck kettle so the stream stays thin and aimed. Pour in slow circles from the center outward, keeping the water level even across the coffee bed.
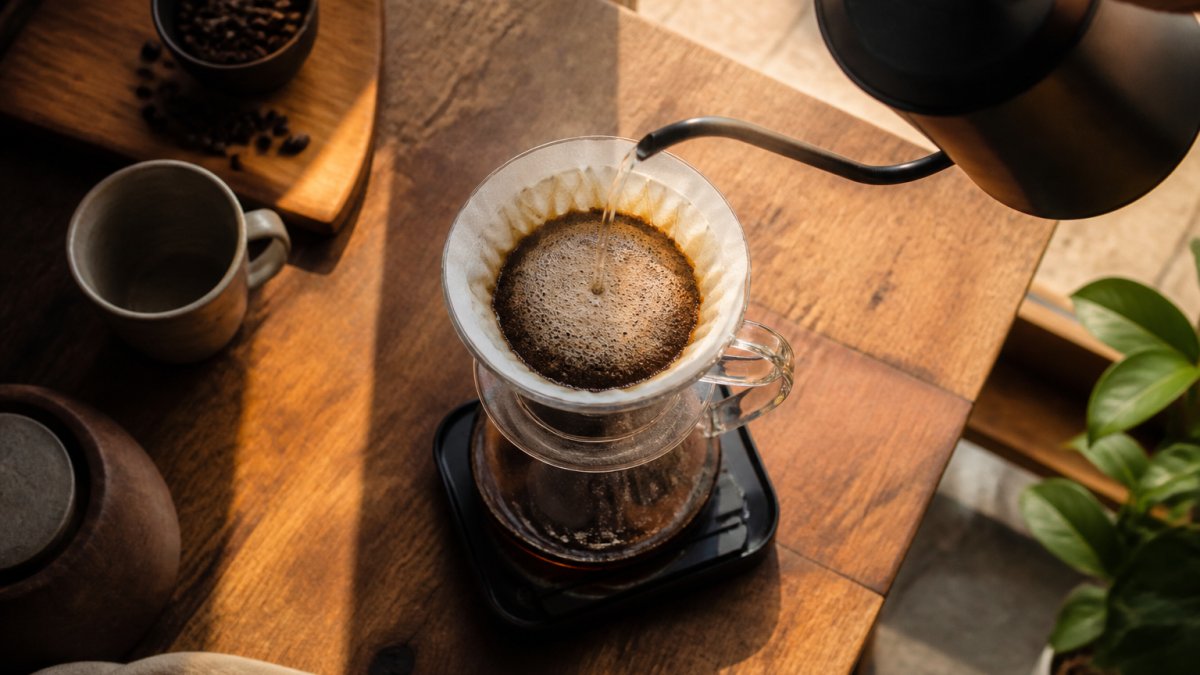
A Concrete Pour Schedule
Vague instructions like "pour slowly" are hard to repeat. A schedule you can time against a scale is easier to control and easier to adjust. For a 15 g dose to 240 g of water:
- Bloom: 30 g of water, gentle swirl, wait 30-45 seconds.
- First pour: pour to 120 g over about 20-30 seconds, spiraling from the center out and back, staying inside the bed.
- Second pour: wait until the bed just stops bubbling, then pour to 180 g.
- Final pour: pour to 240 g, then give the dripper a gentle swirl to flatten the bed.
- Drawdown: target a total brew time of roughly 2:30-3:00. If it finishes much faster or slower, that is your signal to adjust grind, not pour speed.
Pour Pattern and Water Level
- Keep the stream thin and aimed. A gooseneck kettle lets you place water precisely; a wide spout dumps water in the center and digs a channel through the bed.
- Stay inside the coffee bed. Pouring against the paper wall sends water down the sides without touching much coffee, the classic cause of a weak, uneven cup.
- Watch the water level. Keep it roughly an inch above the bed. Too high and you lose control of contact time; too low and you risk disturbing the bed unevenly.
- Pulse pouring vs. continuous: Pulse pouring (adding water in stages, letting the bed settle between pours) gives more control over drawdown and extraction. Continuous pouring is faster but less forgiving, pick one and keep it constant while you tune other variables.
Test One Change at a Time
Pouring is where brewers most often change three things at once and then cannot tell what helped. Pick a single variable, pour height, spiral speed, or number of pulses, change only that, and brew the same recipe again. Note the result in a short brew log (dose, water, grind setting, temperature, total time, and a one-word taste note). A repeatable log is what turns a lucky cup into a reliable one.
7. How to Fix Bitter Pour-Over Coffee (and Sour Cups Too)
Learning how to fix bitter pour-over coffee comes down to reading the cup and changing one variable. Bitterness means over-extraction; sourness means under-extraction. Taste first, then adjust, and never change two things at once or you will not know what worked.
Symptom-to-Adjustment Troubleshooting
| What You Taste | Likely Cause | Adjustment |
|---|---|---|
| Bitter, dry, ashy | Over-extraction | Coarser grind or cooler water |
| Sour, thin, sharp | Under-extraction | Finer grind or hotter water |
| Weak and watery | Ratio too loose | More coffee, same water |
| Muddy, no clarity | Inconsistent grind | Better burr grinder |
| Papery or flat | Unrinsed filter | Rinse filter before brewing |
Change one variable, brew again, and compare. Keep a short note of what you changed so a good cup becomes repeatable. That habit, more than any single tip, is what separates a decent pour over from a great one.
Conclusion
Chasing a better cup can feel endless when every guide throws a new variable at you. Start with fresh, roast-to-order beans, then dial in grind, ratio, and temperature one at a time. Saltwood Coffee roasts to order and ships the same day it's roasted, with single-origin beans like [our medium-roast Colombia offering dried orange, berry, and chocolate notes](/products/colombia) that reward careful brewing. Our no-standing-inventory approach means peak freshness in every bag. Start the Ritual and taste what a fresh, balanced cup can do.

Frequently Asked Questions
What grind size is best for pour-over coffee?
A medium-fine grind, roughly the texture of table salt, works for most pour-over setups. If your cup tastes sour or thin, grind finer to slow the drawdown and pull more flavor from the coffee bed. If it tastes bitter or harsh, grind coarser. Adjust in small steps and change only the grind between brews so you can actually tell what made the difference.
Why does my pour-over coffee taste bitter?
Bitterness usually means over-extraction. Common causes are a grind that is too fine, water that is too hot, or a brew time that runs long. To fix bitter pour-over coffee, coarsen the grind slightly, let the water cool a little before pouring, and check that your total brew time stays in a reasonable range. Change one variable at a time so you know which adjustment helped.
What water temperature is best for pour-over coffee?
Most pour-over coffee brews well between 90°C and 96°C. Lighter roasts like a medium-light Ethiopia Natural often benefit from the hotter end of that range, while darker roasts can turn bitter above 94°C. If you do not have a temperature-controlled kettle, boil water and let it rest for about 30 seconds before you start pouring.
How do I make pour-over coffee taste stronger?
Increase the coffee dose or tighten your pour-over coffee ratio rather than adding more water. A good starting point is 60 grams of coffee per litre of water, then adjust from there. A finer grind and a slightly slower pour also raise concentration. Keep notes on dose, water weight, and grind so you can repeat the cup you liked.
What is the 15-15-15 coffee rule?
The 15-15-15 rule is a simple memory aid: a 1:15 coffee-to-water ratio, water at about 15 units above room temperature in the brewer's preferred scale, and a brew that finishes in roughly 15 minutes short of an hour, meaning about 3 minutes total. Treat it as a starting point, not a law. Taste the cup, then adjust grind, ratio, or temperature one at a time until it suits your beans.